
Hi! I’m Heather from Dollar Store Crafts, a daily blog devoted to making cool crafts with dollar store stuff. I’m so excited to be swapping posts with Dot!
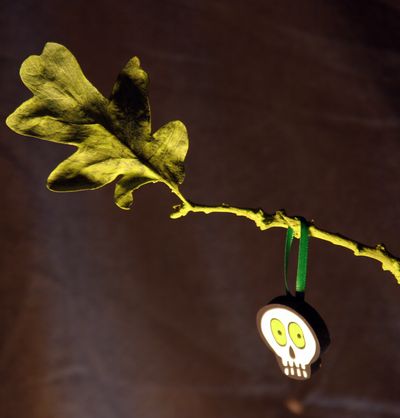
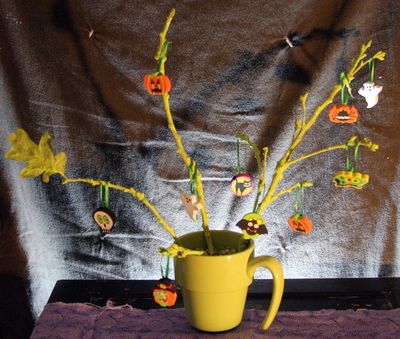
Fall is here, and with it, an abundance of oak leaves and branches in my yard! I love our old-growth oak trees, but they sprinkle me with more presents than I can handle. What to do with nature’s bounty? Craft with it! I spent a couple minutes gathering branches to transform into this spooky Halloween-themed tree. Ornaments are quick and easy: dollar store erasers!

Project Estimate:
- Tree branches, gathered from outside
- Halloween erasers, $1
- Ribbon, on hand
- Acrylic craft paint, on hand
- A mug, cup, jar, etc., on hand
- Floral foam, on hand (or use playdough or dried beans)
- Hot glue, on hand
Total cost: $1 and up
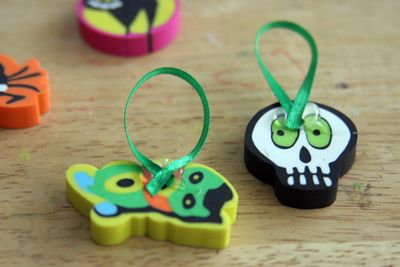
Making the Ornaments: My biggest stroke of crafting genius happened when I was in the checkout line at the dollar store: the impulse buys near the counter included a set of Halloween erasers. Perfect for ornaments for my tree. I found ribbon to attach to them in my stash, but you can also use yarn, thread, embroidery floss, or whatever you have. I glued the ribbon to the backs of the erasers with hot glue (I pressed the ribbon into the glue using the tip of a pencil, thus avoiding the typical hot glue finger burn scenario!).
You can also just make your own ornaments out of paper cut outs, or other dollar store Halloween decorations you come across. I think it would be really cute to accent the tree with tulle bows in black, purple, or orange, but I was trying to keep this really simple and low-budget, and I don’t have any in my stash.
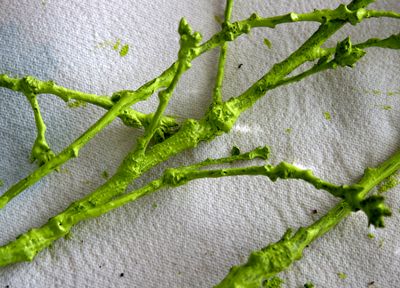
Painting the Branches: I chose to use acrylic craft paint for this project–it’s usually my go-to painting solution for dollar store crafting because it’s cheap, comes in a ton of colors, and is easy to clean up. Craft stores have acrylic paint in small bottles for about $.50 or less, and usually have hundreds of colors. The main drawback to using acrylic is that it will take you a bit of time: it’s easy, but it takes a few minutes. Like about fifteen minutes, depending on how many branches. I just put my branches on a paper towel and painted them. Oh, and I kept one leaf on a branch just because I thought it might be spooky. I just painted it along with the branch, and I really like how it turned out!
However, it would be quick and simple to use spray paint to paint the branches. You could probably be done painting in about two minutes if you use spray paint. I glanced at the spray paint aisles at my local stores, but I didn’t find the color I wanted (chartreuse), and all the fashiony colors were more expensive than I wanted for this project. You can find black or white spray paint at your local big-box retailer for less than a dollar, though!
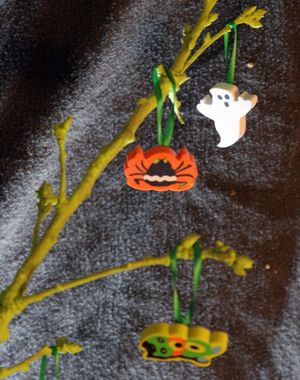
Potting the Tree: I used a dollar store mug I already had on hand to pot the tree. You can use pretty much any sturdy container, though: jars, flower pots, vases, etc. I don’t have any floral foam on hand, so I filled the mug up with dried split peas and stuck the branches in. This works to keep the branches fairly upright, but they did shift around with the slight weight of the eraser ornaments. This method might work better if you are using lightweight paper ornaments. Also, I have little kids, so there’s no way I’m actually going to leave a decoration out with tiny loose objects within easy reach because they know how to reach messy town in seconds! Another good option is to put playdough in the container to anchor your branches. You can make your own for pennies (my favorite no-cook playdough recipe is in the first comment in this Instructables tutorial).
You can customize this project any way you want, but it could be a fun one for kids (just do the hot glue part yourself).
Thanks, Heather, for sharing! I’ll be visiting Dollar Store Crafts next week to share a Dabbled project! – Dot