
All Shrinky Dinky Test Lab Posts
The Shrinky Dink Test Lab – Part 1
This started so simply. I was going to make these charms and that was going to be that. The project was to make cool looking jewelry, rather than childish stuff. Well, it grew from there as after I was finished I got some more ideas, and kept trying things, so stay tuned for more fun successes and failures playing around with recycled plastic shrinkies!

Doodle Charms
Here’s a quick fun project! You don’t need to be able to draw more than a doodle, and you end up with pretty & interesting jewelry!
These charms can be used for earrings, necklaces, or whatever you’d like. They are made out of plastic recycled from a to-go container (#6 plastic). The directions below are for 2 matching ones, which could be earrings. Because plastics & pens vary, you might start out with a test piece so see how much your plastic will shrink, and how your colors come out. Or just jump right in! It’s only trash.
Materials
Plastic: It needs to be marked #6. Many to-go containers seem to work.
Sharpie Markers in a variety of light colors, plus black.
Hole punch
Toaster (or regular) oven, preheated to around 250 degrees F

Cut out two pieces of the flat parts of the plastic container in the size/shape you want. Mine was about 3 inches x 2 inches. You could also do circles or other shapes, but you need to round off any corners because corners will get sharp when shrunk. (note: all plastic doesn’t melt the same and keep the same proportions, so cut both pieces running the same way. e.g. if you’re doing 2 rectangles, cut out one large rectangle and cut it in half to ensure your pieces run the same way. If you’re doing circles, be sure to mark the top and put your holes in the same place.)
On each one, use a hole punch to make a hole in the top center.

Draw your doodle design on each one with the black sharpie. The designs don’t need to be the same, and be creative. Just a series of shapes and doodles. If you’re nervous about drawing it, practice on a spare piece. And you can always draw something on paper and trace it on to the plastic. Remember, shrinking hides a multitude of sins!
Randomly color in the design using a variety of light colors. Colors get way more intense when shrunk. The black will smear if you touch another color to it, so be careful. Again, shrinking will hide most issues.
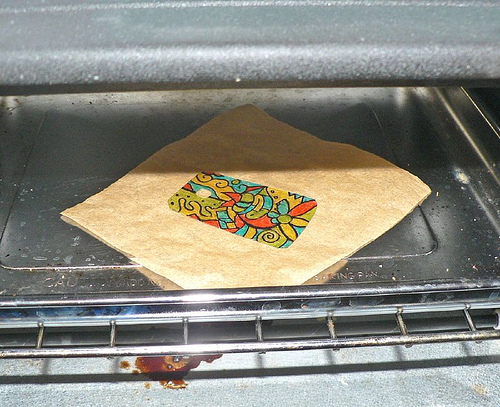
Place your colored piece on a square of parchment paper, on a tray in your toaster oven. Watch the magic happen! Don’t worry… it will curl up. and curl up again. then finally settle down to the smallest size.

If it’s not quite flat at the end, you can press it down flat immediately. Note, depending on your plastic, it may not be quite the same proportions as you started with.

Voila!
Another fun option: Punch holes in the top and bottom of the charms, and you can string them together into dangly earrings.
Note: these aren’t sealed, so treat them gently… We’ll get to the hassles with sealing in the next experimentation phase!
If you try this (or have your own previous attempts!) comment here with a link… Also, all commenters for this series of posts (links or not) will be entered in a drawing to win one of the featured attempts!
Related:
Introduction to the Shrinky Dinky Test Lab
Part 2: The Experimentation Begins!
Part 3 – More experiments!
All Shrinky Dink Test Lab Posts
Note: the idea of shrinkies from to-go plastic is certainly not original – i think i heard it first on Curbly